I’m a member of numerous groups for crocheters on Facebook, and I love to look at both Pinterest and Instagram for inspiration for my next project, which means I always have a project going. Over time, I have found some crochet tips that have saved me time and time again 😀
I have chosen my 4 best tips that I hope you can use 💗
1. Starting chain with a larger hook
Have you tried to start a blanket or a washcloth, only to realize that the starting chain pulls the whole project into a weird shape? That is because your starting chain is too tight. It’s really annoying, but it often happens with patterns where the stitches uses up more space than a regular chain stitch. You can easily avoid this problem by working the starting chain either very loosely, or on a crochet hook that is a size larger than what the project will be worked in. It makes a world of difference!
If you are looking for a new hook, or a different size, I always recommend the amazing Soft Touch Crochet Hooks from Clover.

In the picture above, I have started a washcloth, where my starting chain was way too tight. It’s obvious how bad it is! 😱 If I keep going with the project, it will just get worse. The only solution is to start over with a larger hook.
2. When working in the round - spiral or completed rounds?
Are you also confused when working in the round about whether to choose the spiral technique or completed rounds? Of course, it depends on what you like the best, but I often use this rule:
1. Amigurumi (teddy bears, animals, etc.): spiral
2. Everything else: completed rounds (ending with a slip stitch and beginning with a chain)
See the difference between the two methods below 👇

Of course, the rule doesn’t work every time, there are pros and cons to both methods: With the spiral there are no visible transitions between rounds, but it is difficult to make a nice color change, and the work tends to skew in one direction. With completed rounds you end each round with a slip stitch and begin with a chain. The completed rounds give a nicer color change and the stitches line up on top of each other. Unlike the spiral, there are visible transitions between the rounds because of the slip stitch + chain.
Which method you use, has a big impact on the project’s look. For example, if you want to make this basket in knit stitch, you want to have stitches that sit directly on top of each other, or else the “knit effect” of the pattern won’t work – this can be avoided by working in completed rounds.
3. Weave in the ends as you work
Do you hate to weave in the ends of your project? So do I! There’s nothing worse than finishing a project, and now you have to spend time weaving in each individual end. In my case, I often procrastinate when it comes to weaving in the ends, so it might take a couple of weeks 😉 You can easily avoid the many hours with a darning needle and scissors if you just crochet over the ends as you go. Do as follows: The yellow yarn is the end that becomes secured by crocheting over it.

Change the skein of yarn and lay the end from the old skein and the end of the new skein on top of the stitchs from the previous row. Crochet over the stitches and the ends of the yarn at the same time. By doing this, the ends are secured and you don’t have to weave them in at the end 😄
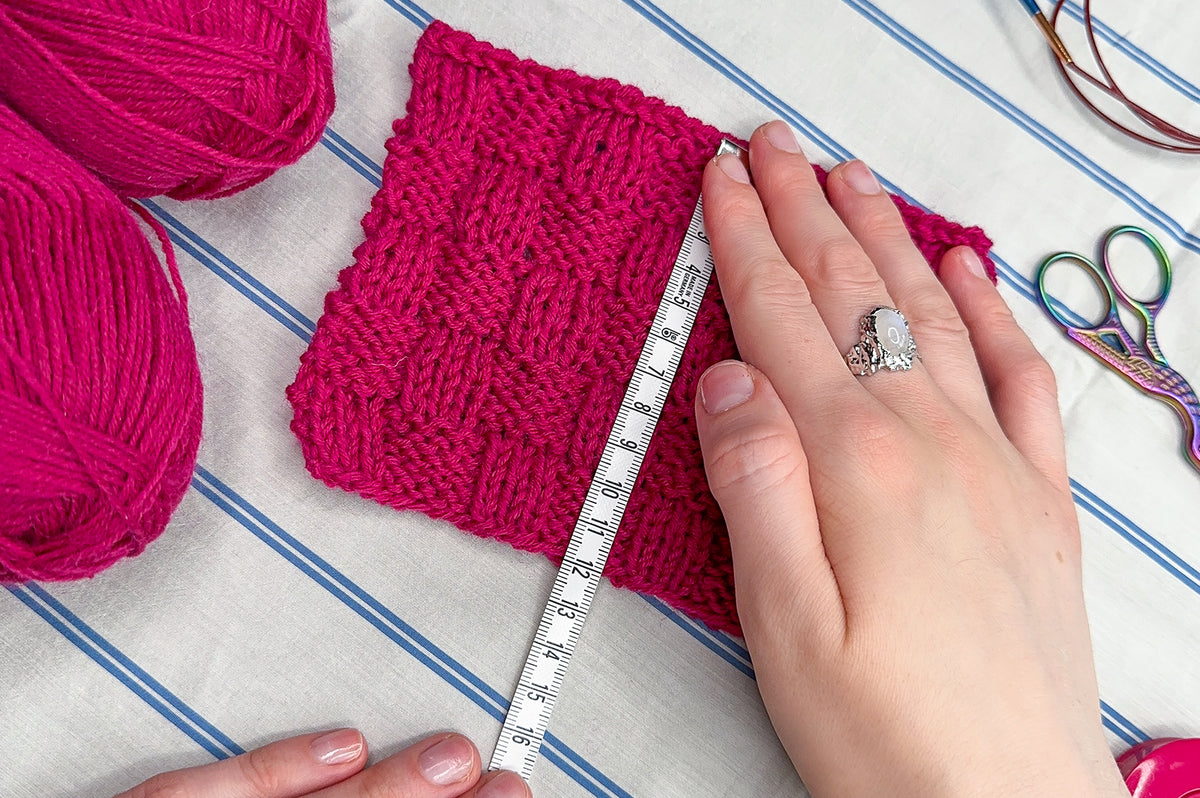
4. Keeping track of stiches and rounds
If you, like me, are not so fond of counting stitches when you crochet in the round, then a marker thread is for you! You crochet the thread in your work, so every time you start a new round, you bring the thread with you and thus mark the start of a new round. That means that you only need to count the rounds, not the stitches. See the picture below:

I’ve used a white marker thread in the first round from the heel of the sock and throughout the rest of the project. Use a row counter and avoid having to use paper and pencil. I am really happy with my row counter, and I cannot work without it!
Buy your own row counter here.
Good luck with your next crochet project 💗
Best Wishes
Josefine, Hobbii